How-To
What Is the Two Bucket Method? A Swirl-Free Guide
Key Takeaways
- The two bucket method uses one bucket of soapy water and one bucket of clean rinse water to wash a car by hand.
- You dip the wash mitt in the soap bucket, wipe one section of the car, then rinse the dirty mitt in the second bucket before reloading it with soap.
- This keeps abrasive grit off the paint, which is the main cause of swirl marks and light scratches.
- A grit guard is a plastic grate at the bottom of each bucket that traps dirt so it cannot get stirred back onto the mitt.
- A foam cannon is a popular upgrade that loosens dirt before the mitt ever touches the paint, making the whole wash safer.
The two bucket method is a hand-washing technique that uses one bucket for soapy water and a second bucket to rinse dirt off your wash mitt, so grit never gets dragged back across your paint. It is the single easiest habit that separates a swirl-free finish from a hazy, scratched one.
Most swirl marks are not caused by a car being dirty. They are caused by how the car gets cleaned. Every time a mitt loaded with dirt touches paint, those tiny particles act like sandpaper.
This guide breaks down why the method exists, what gear you need, and how to run it step by step. It is beginner-friendly, and by the end you will understand why nearly every detailer washes this way.
Why does the two bucket method exist?
The whole point is to keep abrasive grit off your paint. When you wash with a single bucket, every dirty pass sends road grime back into the same water you keep dipping into.
Within a few minutes, that one bucket becomes a slurry of grit. You are essentially rubbing dirt back onto the car with every stroke, which grinds fine scratches into the clear coat.
Splitting the job into two buckets solves this. The dirt you pick up gets dropped into a separate rinse bucket, so the mitt goes back into clean soap every single time.
- Single bucket: dirt keeps recirculating into your soap
- Two bucket: dirt gets isolated in a separate rinse
- The result: far fewer swirls and a glossier finish
What gear do you need?
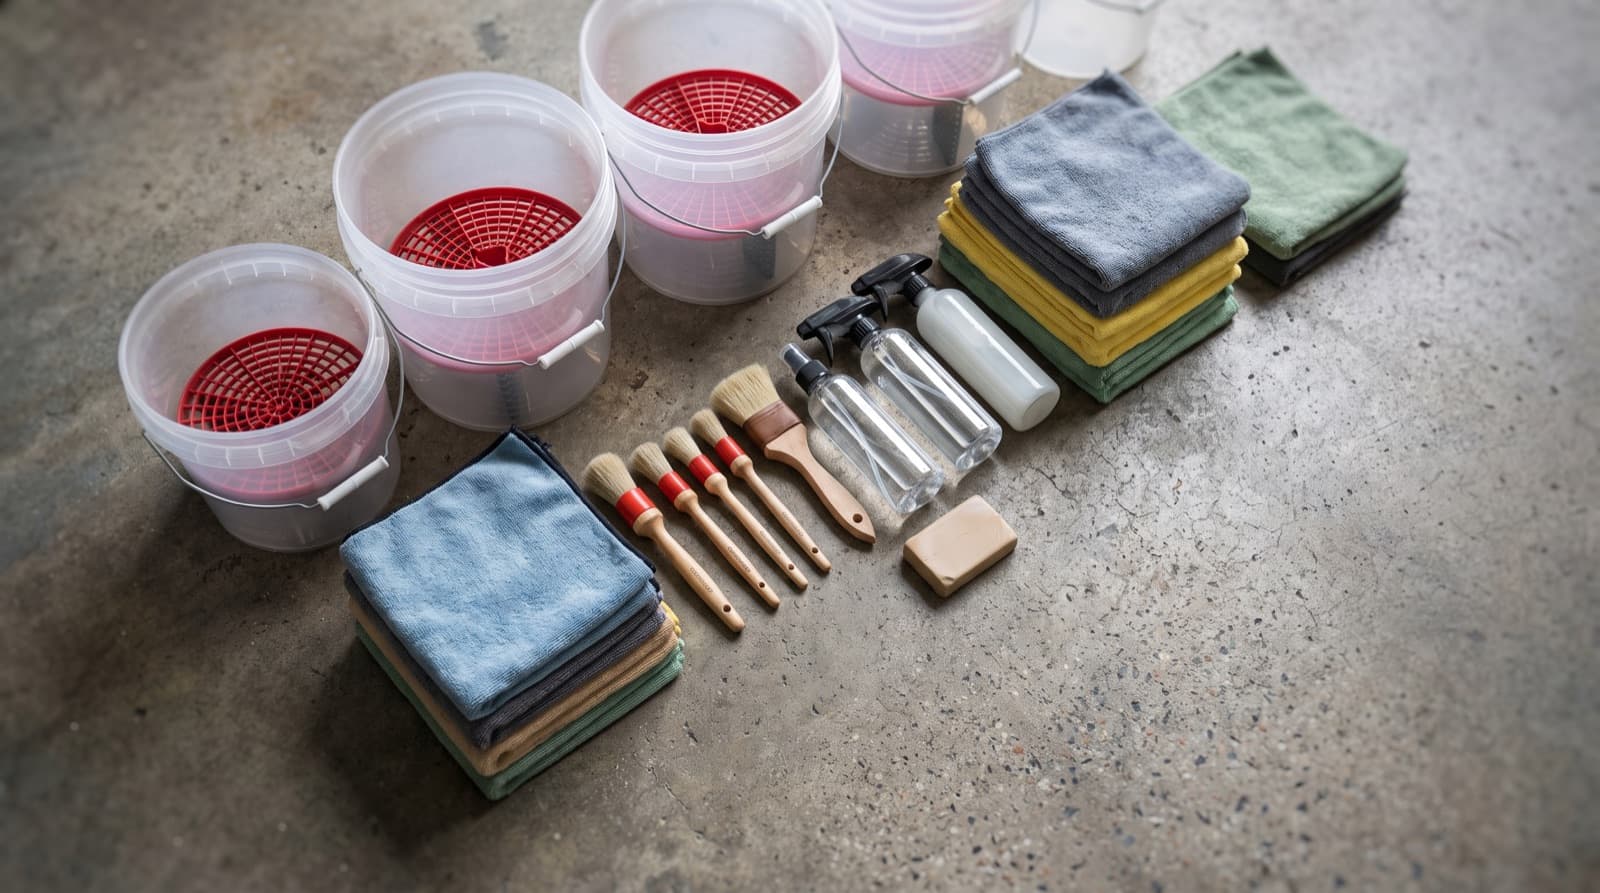
The setup is cheap and lasts for years. You do not need anything fancy to get most of the benefit.
The two grit guards are the part beginners skip most often, and they matter more than people expect.
| Item | What it does | Roughly |
|---|---|---|
| Two 5-gallon buckets | Separate soap and rinse water | $10-20 |
| Two grit guards | Trap dirt at the bottom of each bucket | $15-25 |
| Microfiber wash mitt | Holds suds, releases grit when rinsed | $10-20 |
| pH-neutral car soap | Cleans without stripping wax or coating | $15-25 |
| Grit guards can be added to buckets you already own, so the real cost of upgrading is often under $30. |
Pro tip: Owner tip from Muza: use two different colored buckets and never swap them. Blue for soap, black for rinse. It sounds silly, but it stops you from dipping the dirty mitt into your clean side on autopilot.
How do grit guards work?
A grit guard is a plastic grate that sits at the bottom of each bucket, an inch or two off the floor. It creates a barrier that keeps settled dirt from getting stirred back up.
In the rinse bucket, you scrub the mitt against the grid to knock loose grit free. That debris falls below the guard and stays there, trapped, instead of floating back into the water.
Without a grit guard, one hard swirl of the mitt can lift all that settled dirt right back into circulation. The guard is what makes the rinse bucket actually clean the mitt.
What are the step-by-step instructions?
Here is the full sequence once your car is already rinsed with a hose. Work top to bottom, because the lower panels are always the dirtiest.
- Fill one bucket with soapy water and one with plain water, each with a grit guard
- Rinse the whole car first to knock off loose dirt and dust
- Dip the mitt in the soap bucket and wash one panel, using straight lines, not circles
- Dunk the dirty mitt in the rinse bucket and scrub it against the grit guard
- Squeeze it out, reload with soap, and move to the next panel
- Save the lowest panels and bumpers for last, since they hold the most grit
- Rinse the car and dry with a clean microfiber towel or a blower
Pro tip: Wash in straight, overlapping lines instead of circles. If you do leave a faint mark, a straight line is far less visible to the eye than a swirl.
How does this actually prevent swirls?
Swirl marks are thousands of tiny scratches in the clear coat that catch light and look like spider webs, especially under sun or a garage bulb.
They come from dragging hard particles across soft paint. The two bucket method attacks that at the source by making sure the mitt is clean each time it touches the car.
It will not undo scratches that are already there. Existing swirls need paint correction to remove, but washing this way stops you from adding new ones week after week.
Does this matter in San Francisco?
It matters more here than in most places. SF cars pick up a gritty cocktail of street-parking dust, brake grime, salt air off the bay, and dried mineral deposits that all love to scratch paint.
Fog and the marine layer leave a fine film that feels soft but hides plenty of abrasive particles. Skip the two-bucket habit and you grind that film in every wash.
If you street park with no garage, or you just want it done right without hauling buckets around, our mobile team handles the safe wash at your curb. We bring our own water and power to your driveway, office, or street spot anywhere in the city.
Pro tip: Salt air is the sneaky one. If you park near the coast or the bay, rinse the car more often between full washes to keep that salty grit from building up.
What upgrades make it even safer?
Once the basics feel natural, a foam cannon is the best next step. It attaches to a pressure washer and blankets the car in thick suds that loosen and lift dirt before your mitt ever touches the paint.
That pre-soak means the mitt has less grit to deal with, so each pass is gentler. Some detailers add a third rinse bucket dedicated to wheels, since wheels carry the heaviest, sharpest brake dust.
None of this replaces the two bucket core. It just stacks on top to make an already-safe wash even safer.
- Foam cannon: pre-soaks and loosens dirt before contact
- Third wheel bucket: keeps brake dust away from paint gear
- Two mitts: one for paint, a separate one for lower panels
Frequently Asked Questions
Is the two bucket method really necessary?
For anyone who cares about their paint, yes. A single bucket recirculates grit and slowly fills the clear coat with swirl marks. The two bucket method costs almost nothing to add and is the biggest single upgrade a home washer can make.
Can I use the two bucket method without grit guards?
You can, and it is still better than one bucket. But grit guards do a lot of the work by trapping dirt at the bottom so it cannot float back up. They are cheap, so it is worth adding them to get the full benefit.
How often should I wash my car this way?
Every two to four weeks is a good rhythm for most SF drivers, more often if you park near the coast or under trees. In between, a quick rinse knocks off salt and dust so grit does not build up before your next full wash.
What if my car already has swirl marks?
Washing correctly stops new swirls but will not remove existing ones. Those need machine paint correction to level the clear coat and restore gloss. Golden Bay Detailing offers one-step and multi-step paint correction, and we can tell you which level your paint actually needs.
Do I still need two buckets if I use a foam cannon?
Yes. The foam cannon loosens dirt, but you still make contact with a mitt to lift it off, and that mitt still needs a clean rinse between panels. The two work together rather than replacing each other.
Keep reading from Golden Bay
Want a swirl-free wash without the buckets?
Golden Bay brings the water, power, and safe-wash technique to your driveway anywhere in San Francisco. Get a free quote today.